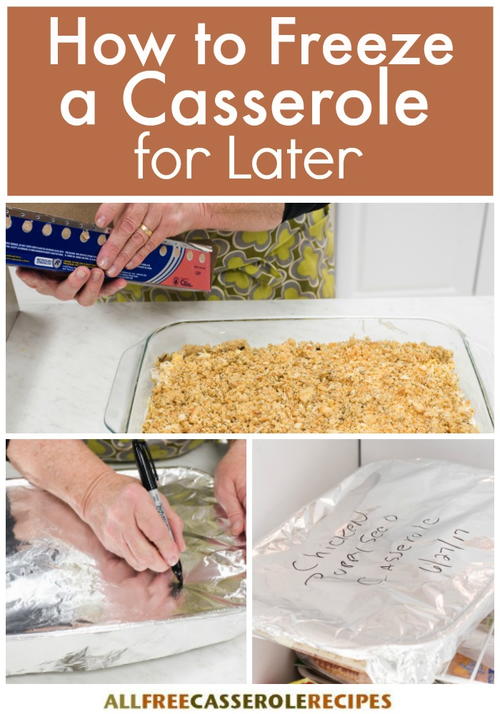
How to Freeze a Casserole for Later
Freezer meals are a great way to save time on meal prep. Learn how to package meals, how to thaw them, and more in this complete guide on freezing casseroles.
During a busy week (or a global health crisis), having a meal that's already made will be a lifesaver. After all, using the oven is the easiest step in making a casserole.
However, if you don't know what you're doing, freezer meals can quickly turn into recipe fails. Mushy pasta, freezer burn, and even shattered glass pans are all disasters that can happen.
Luckily, we've laid out all the answers so all of your casseroles will be a success.
Learn how to evaluate a recipe for freezing, ways to package casseroles for the freezer, how to thaw frozen meals, and much more.
Plus, check out the complete Test Kitchen-approved recipe for Freezer-Friendly Chicken Poppy Seed Casserole below.
Find out how to make the most of your freezer with the help of our guide, How to Freeze a Casserole for Later.
Evaluating the Recipe: Can the ingredients be frozen?

While almost anything can be stored in the freezer (except for sealed cans and bottles!), there are some foods that don’t defrost as well.
- Crumb toppings – When these toppings are thawed they can sometimes be soggy. To prevent this, add the crumb topping just before adding the casserole to the oven.
- Dairy Products & Emulsions - When stored individually, these products may separate when thawed. However, they are usually fine when mixed with other ingredients, but there may be a slight change in texture.
+ Mayonnaise
+ Soft cheeses
When to Freeze a Casserole: Before or After Cooking?

Freeze It Before Cooking If:
+ All of the ingredients in the casserole are already cooked (such as ground beef), the recipe should be frozen before it is baked.
Freeze It After Cooking If:
+ The casserole contains uncooked rice, raw vegetables, or meat that has been thawed for the recipe preparation.
+ The casserole has a lot of liquid or sauce. Lasagna and pot pies are good examples of this.
Packaging Materials for Freezer Meals
These are good items to have on hand when preparing, storing, and cooking freezer casseroles.
- Disposable foil pans
- Aluminum foil
- Casserole pans
- Freezer bags
- Permanent marker
- Label maker (for serious cooks!)
- Thermometer
Freezer Packaging Methods
Note: When freezing cooked foods, always make sure to cool foods completely. Freezing warm foods can create ice crystals which is what causes freezer burn. Storing warm food can increase the temperature of the freezer which can thaw other frozen foods.
Foil + Plastic Freezer Bag: The casserole pan is lined with foil before the food is added. Once frozen, the food is lifted out, wrapped in the excess foil, and stored in a plastic freezer bag.
Pro: This will free up your casserole pans so this method works well for long-term storage. It also will save space in your freezer as these packages will be easy to stack.
Con: Not great for meals with a lot of liquid such as pot pie. It can be difficult for them to hold their shape unless your freezer is very, very cold.
Foil-Wrapped Glass Casserole Pan:
Pro: This method is good for short-term storage. If you’re making a meal a week in advance, for example, this would be good method.
Con: It will take up extra freezer space and occupy your pan. Unless you have a lot of extra baking pans and freezer space, this isn’t great for long-term storage.

Disposable Aluminum Pan:
Pro: Your casserole pans won’t be out of commission in the freezer – they’ll be free to use! If necessary, you can take food directly from the freezer to the oven without the fear of the pan shattering.
Con: Not environmentally friendly. These pans are disposable can only be used a few times at the most.
Glass Pan with Sealable Lid: A glass casserole pan that comes with a locking lid.
Pro: The sealed lids will prevent freezer burn. This pan could go from the freezer to the oven and microwave, which makes it a convenient choice.
Con: If freezer space is limited, these containers can take up a lot of space.
For more information on the product below, check out our full review of Smart Planet Glass Bento Meal Container.

Tips for Packaging Freezer Meals:
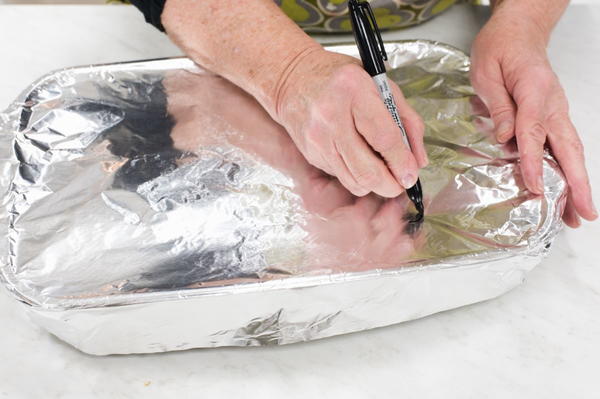
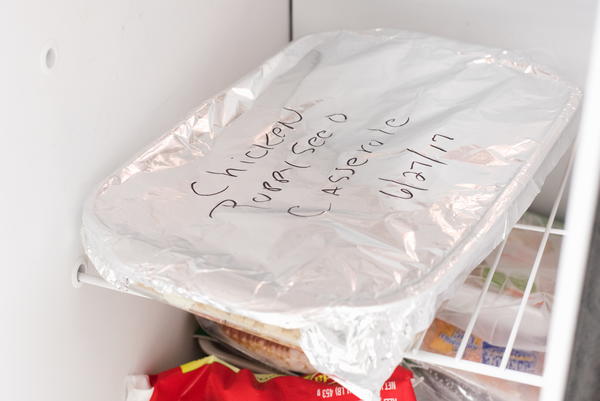
- ALWAYS write the name of the recipe and the date. Adding the defrosting instructions and cook time would also be a great idea!
- If you don’t have a vacuum sealer, use a straw to remove excess air. See how to do it in this tutorial from lifeasmom.com.
- Use shallow pans whenever possible because it will make for easier reheating or baking.
How to Thaw Freezer Meals
How long does it take to thaw a freezer meal?
Depending on the size of the casserole and its ingredients, it can take anywhere from 24-48 hours for a casserole to thaw in the refrigerator.
Defrosting Methods
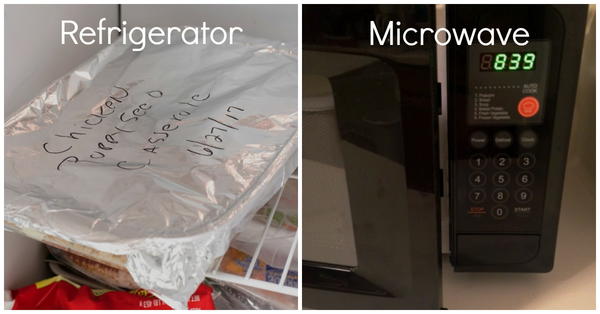
+ Refrigerator – This is the best method in terms of food safety and end result. You just need to allow enough defrosting time! It is also safe to refreeze the meal if you change your mind.
+ Microwave – The meal must be cooked immediately after it is defrosted because it sends the food temperature below safe levels (40 degrees F). Aluminum foil and plastic wrap must be removed before microwaving. This also cannot be used with disposable foil pans.
– Cold Water Bath – This isn’t a good choice for defrosting casseroles, but is great for quickly defrosting meats.
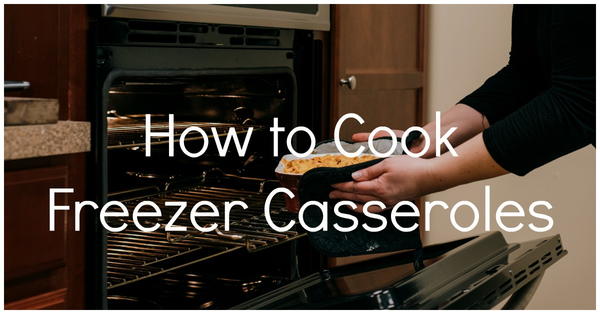
How to Cook Freezer Casseroles
Note: If you are using a glass casserole dish, be sure to let it reach room temperature before baking in the oven. This is important because drastic changes in temperature can shatter a glass pan.
- The more time a casserole has to thaw, the less additional cooking time it will need.
- You will know for sure the food is cooked when the internal temperature reaches 165 degrees F.
- Remember to remove any plastic wrap before baking your casserole.
Cooking Thawed Casseroles
Adding about 10 minutes to the original baking time should be sufficient. You will know for sure if it is done when the center reaches 165 degrees F.
Cooking Frozen Casseroles
Frozen meals can be baked before they are fully defrosted, but it is not ideal. The cooking time will need to be increased by about 50%, according to Kelly from Once a Month Meals. For example, if you are baking a casserole with an original bake time of 1 hour, it will need to cook for 1 ½ hours. It is done when it reaches 165 degrees F.
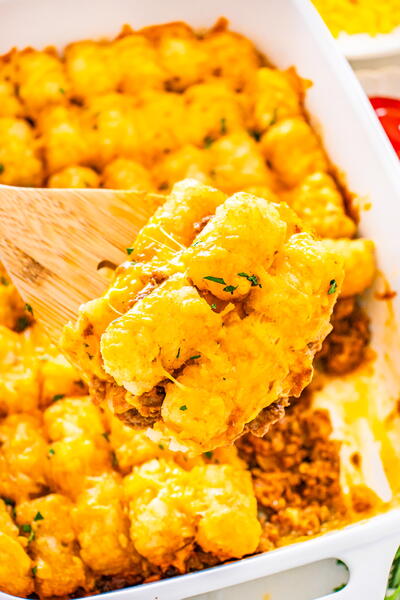
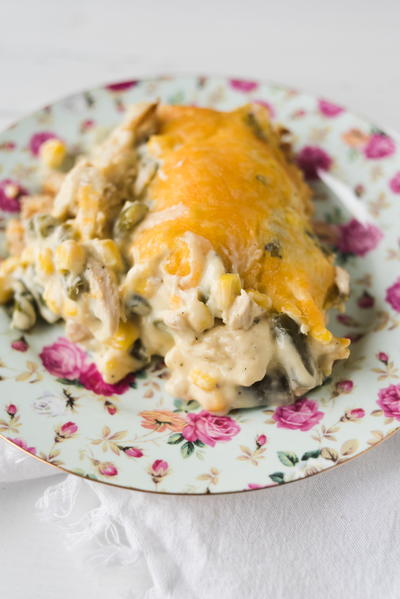
Freezer-Friendly Casserole [Full Recipe]

Freezer-Friendly Chicken Poppy Seed Casserole
Yields: 6 servings
Preparation Time: 25 min
Cooking Time: 30 min
Cooking Vessel Size: 9 x 13-inch baking dish
(Click here to get a printable version of the recipe.)
Ingredients
3 cups cooked wild rice
1 (10-1/2-ounce) can condensed cream of chicken soup (Do not dilute)
8 ounces sour cream
1/2 cup chopped pecans
3 cups cooked and shredded boneless, skinless chicken breasts
1 cup frozen peans (optional)
1 teaspoon Worcestershire sauce
1 teaspoon minced garlic
1 cup shredded Colby Jack cheese
1 1/2 cup crushed butter crackers
2 teaspoons poppy seeds
1 stick unsalted butter, melted
To Make the Casserole
- Lightly grease a 9 x 13-inch baking dish with cooking spray.
- Spread the cooked rice over the bottom of the baking dish.
- In a large mixing bowl combine the soup, sour cream, pecans, chicken, peas (if using), Worcestershire sauce, and garlic. Spread over the rice.
- Top with cheese.
- In a medium bowl, mix the cracker crumbs and butter. Add in the poppy seeds. Sprinkle over the cheese.
- Bake at 350 degrees F for 30 minutes or prepare for the freezer. (See below for freezing instructions.)
1. Cover the baking dish with heavy duty foil and press firmly to seal.
2. With a marker, write the name of the casserole and the date.
3. Place in freezer until ready to eat. (Click here to get a free printable version of this recipe.)
Your Recently Viewed Recipes

Thanks for your comment. Don't forget to share!
Polly Esther
Sep 15, 2017
I honestly never thought of freezing a meal before eating it - I've only had experience with freezing leftovers. I had no idea you could even put a glass casserole pan in the freezer! Now that I know, I'll definitely be doing some more food prep on the weekends, so that I can freeze a casserole and defrost it for a meal later in the week when I don't feel like cooking. Thanks for the great tips!
Report Inappropriate Comment
Are you sure you would like to report this comment? It will be flagged for our moderators to take action.
Thank you for taking the time to improve the content on our site.

![Casserole Cooking Tips: Ways to Cook Chicken [Infographic]](http://irepo.primecp.com/2016/10/303676/Ways-to-Cook-Chicken-for-a-Casserole-infographic_Large400_ID-1921165.jpg?v=1921165)